 Save to Pinterest
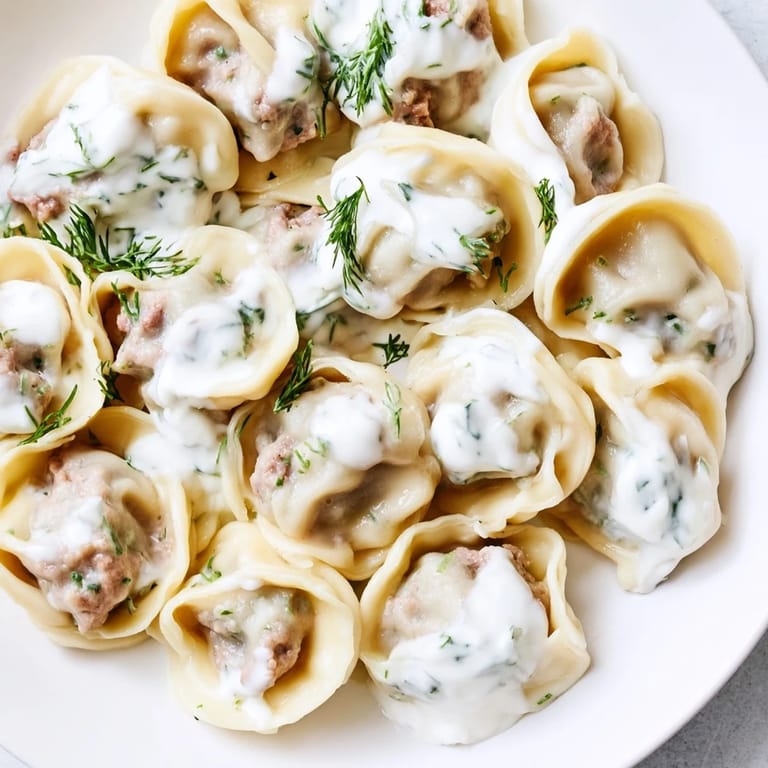
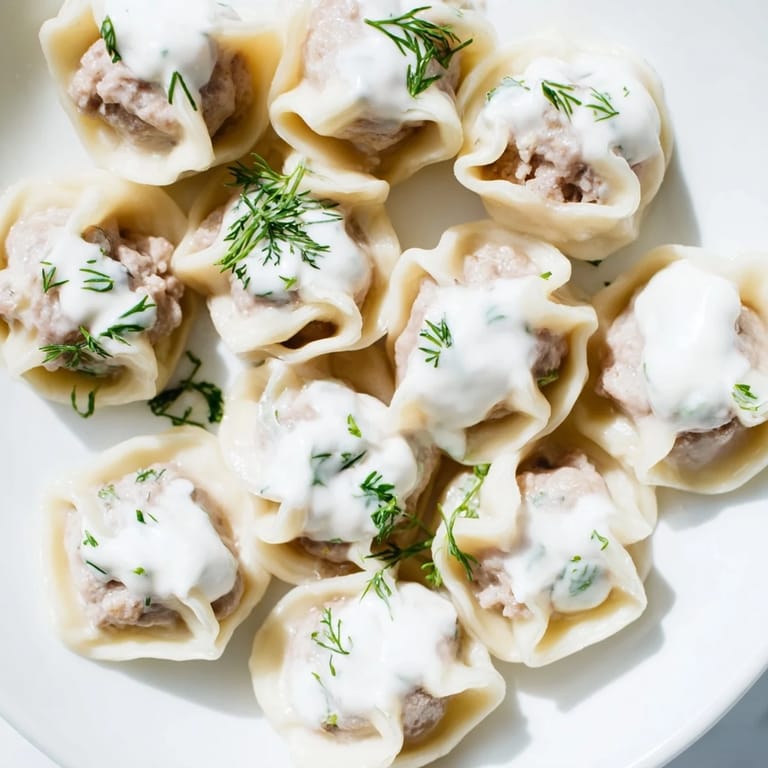
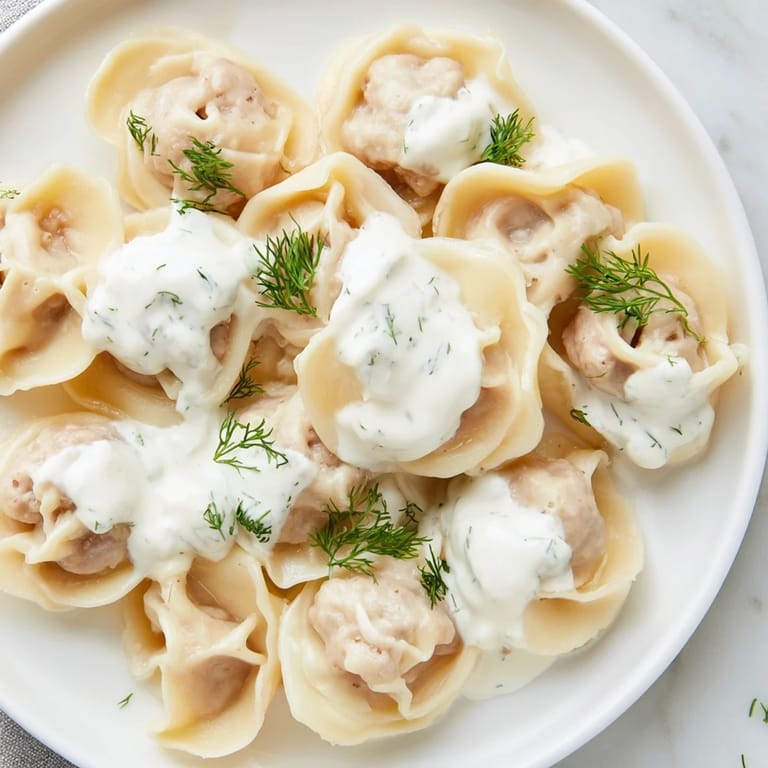
 My grandmother's kitchen always smelled like boiling water and dill when she made pelmeni, and I'd stand on a stool watching her tiny hands fold each dumpling with practiced precision. Years later, I finally understood what made those little parcels so magical—it wasn't just the tender dough or the savory meat filling, but the whole ritual of it, the way she'd serve them steaming hot with a dollop of sour cream melting into every fold. Making pelmeni myself now, I realize it's the kind of dish that connects you to something timeless and comforting. These Russian dumplings are deceptively simple: tender dough wrapping around a seasoned meat filling, then boiled until they float like little clouds and finished with cool, tangy sour cream. Once you nail the technique, you'll find yourself making them constantly.
I remember bringing a pot of fresh pelmeni to a potluck during a snowy January, and watching everyone's faces light up when they tasted them—suddenly the conversation shifted from small talk to people asking for the recipe. There's something about serving homemade dumplings that makes people feel seen, like you've invited them into a secret corner of your kitchen.
Ingredients
- All-purpose flour (2 cups/250g): This is your foundation—use the kind you trust, because cheap flour can make the dough tough and unforgiving.
- Cold water (1/2 cup/120ml) and 1 large egg: Cold water is the secret to a dough that stays pliable; warm water will make it sticky and impossible to work with, trust me.
- Salt (1/2 tsp for dough, 1/2 tsp for filling): Don't skimp here—salt brings out the flavor of the meat in the filling.
- Ground pork and beef (7 oz/200g each): This combination is traditional for a reason; the pork adds tenderness and the beef adds depth, but you can adjust the ratio based on what you prefer.
- Finely grated onion (1 small): Grating instead of mincing releases more juice and flavor into the filling, making it juicier and more flavorful.
- Garlic (2 cloves, minced): Fresh garlic is non-negotiable here; the minced pieces distribute evenly throughout the meat and add brightness.
- Black pepper (1/2 tsp): Fresh cracked pepper makes all the difference—pre-ground loses its punch.
- Cold water for filling (2 tbsp): This might seem odd, but it keeps the filling tender and prevents it from becoming dense when cooked.
- Sour cream (1 cup/240g): The creamy, tangy finish—use full-fat sour cream, not the low-fat version that tastes watery.
- Fresh dill (1 tbsp, chopped): Optional but highly recommended; it's the whisper of flavor that makes people say 'what is that?'
Tired of Takeout? 🥡
Get 10 meals you can make faster than delivery arrives. Seriously.
One email. No spam. Unsubscribe anytime.
Instructions
- Mix and rest the dough:
- Combine your flour and salt in a large bowl, then crack in the egg and start mixing with your fingers or a wooden spoon. Add the cold water gradually—you want the dough to come together slowly so you can feel when it's right. Knead for 8–10 minutes until it's smooth, elastic, and slightly tacky, then cover it with plastic wrap and let it nap for 20 minutes; this rest is when the gluten relaxes and the dough becomes forgiving.
- Build the filling:
- In a separate bowl, combine your ground pork, ground beef, grated onion, minced garlic, salt, pepper, and that cold water—mix everything together with your hands until it looks sticky and well integrated, almost like a paste. Don't be shy about mixing; the more you work it, the better it holds together when you fold the pelmeni.
- Roll and cut:
- Flour your work surface generously and roll out the dough as thin as you can—about 1/16 inch (2 mm) is the goal, almost translucent. Use your round cutter to stamp out circles, and collect the scraps in a ball to re-roll if you want to minimize waste.
- Fill and fold:
- Place about 1 teaspoon of filling in the center of each dough circle, then fold it in half to form a half-moon shape and pinch the edges tight with your fingers or a fork. Now comes the signature move: bring the two corners of the half-moon toward each other and pinch them together, creating that little hat shape that's iconic for pelmeni.
- Boil and float:
- Bring a large pot of salted water to a rolling boil—salt it like you're seasoning pasta, because this water is seasoning the dumplings from the outside in. Drop the pelmeni in gently in batches so they don't crowd the pot, stir them once so they don't stick to the bottom, and wait for them to float to the surface, which takes about 5–7 minutes. Once they're floating, give them another 30 seconds and then fish them out with a slotted spoon.
- Finish and serve:
- Transfer the hot pelmeni to bowls and top generously with a big dollop of cold sour cream and a sprinkle of fresh dill. The contrast of hot dumpling and cool, creamy sauce is what makes this dish sing.
 Save to Pinterest
 There's a quiet satisfaction that comes from watching your homemade pelmeni float to the surface of the water, that moment when you know you've done it right. This dish stopped being about following a recipe for me the night my roommate tried one and closed his eyes like he'd just tasted something from a memory that wasn't even his.
Freezing and Make-Ahead Magic
Pelmeni are the ultimate make-ahead food—lay them flat on a sheet tray, freeze them solid, then transfer them to a freezer bag where they'll keep for up to 3 months. When you're hungry, you don't even need to thaw them; just drop frozen pelmeni directly into boiling water and add maybe a minute or two to the cooking time. I started making double batches on Saturday mornings, and by Wednesday I had a secret stash of comfort in my freezer.
Beyond Sour Cream
While sour cream is the classic pairing, I've learned that pelmeni are actually pretty adaptable once you have the base down. A drizzle of warm melted butter with crispy sage is incredible, and a small bowl of vinegar or a spicy chile oil on the side transforms them into something completely different. The important thing is that the pelmeni themselves are tender and flavorful—the sauce is just the vehicle for whatever mood you're in.
The Shapes and Traditions
Different regions of Russia have slightly different ways of folding pelmeni, and I've spent more time than I'd like to admit trying to perfect the classic hat shape. Some people make them as small half-moons, others fold them into tight triangles, and a few folks I know get creative with their hands and just make little packets. What matters is that the filling is sealed inside and the dough is thin enough that you get that tender bite with meat filling inside. My advice: pick a fold, master it, and then try the others for fun.
- A pinch of nutmeg in the filling adds an old-world warmth that makes people wonder what they're tasting.
- If you're making these for a crowd, you can prep them hours ahead and keep them on a flour-dusted tray in the fridge until you're ready to boil.
- Leftover sour cream sauce keeps in the fridge for days, so don't worry about having extra—it's perfect on potatoes, vegetables, or even as a dollop on soup.
 Save to Pinterest
 Making pelmeni taught me that some of the best food isn't about complicated techniques or exotic ingredients—it's about doing something simple with your whole attention. When you hand someone a bowl of steaming pelmeni, you're giving them more than dinner; you're giving them a taste of something that's been passed down through generations and still tastes like home.
Recipe FAQs
- → What types of meat are best for the filling?
Ground pork and beef are combined for a rich, balanced filling with savory depth and good moisture.
- → How should the dough be prepared for optimal texture?
Mix flour, egg, salt, and cold water until smooth, knead until elastic, and let it rest to develop a tender but firm dough.
- → What is the best way to shape the dumplings?
Roll dough thin, cut into circles, place filling in center, fold into half-moons, then pinch the edges to seal tightly.
- → How can I prevent dumplings from sticking during cooking?
Stir gently after adding dumplings to boiling salted water and avoid overcrowding to keep them separate while cooking.
- → What toppings complement these dumplings well?
A rich sour cream sauce with fresh dill adds a cool, tangy finish that balances the savory filling beautifully.
- → Can these dumplings be prepared ahead of time?
Yes, you can freeze them on a tray first, then transfer to bags for up to three months without losing quality.