 Save to Pinterest
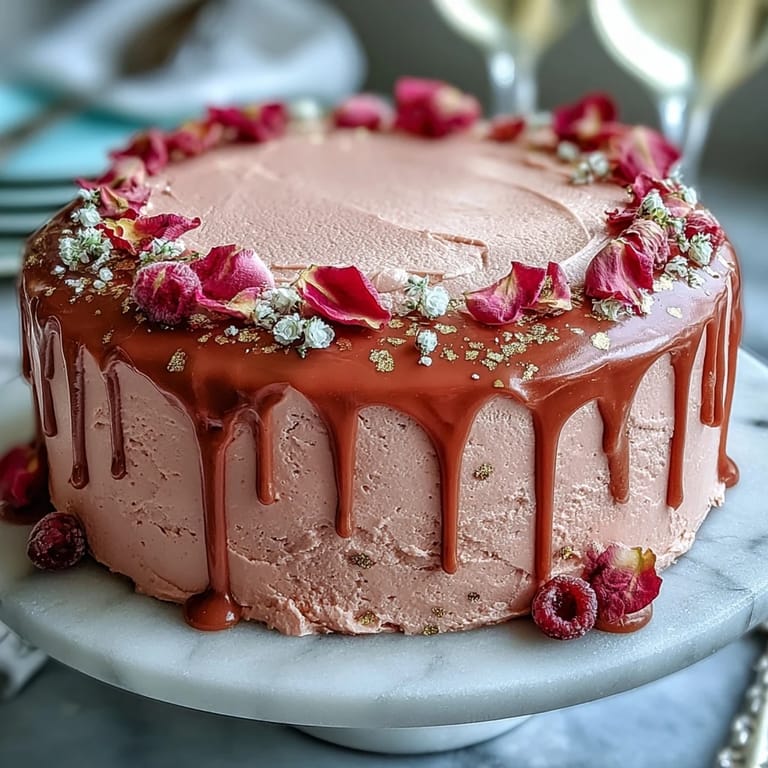
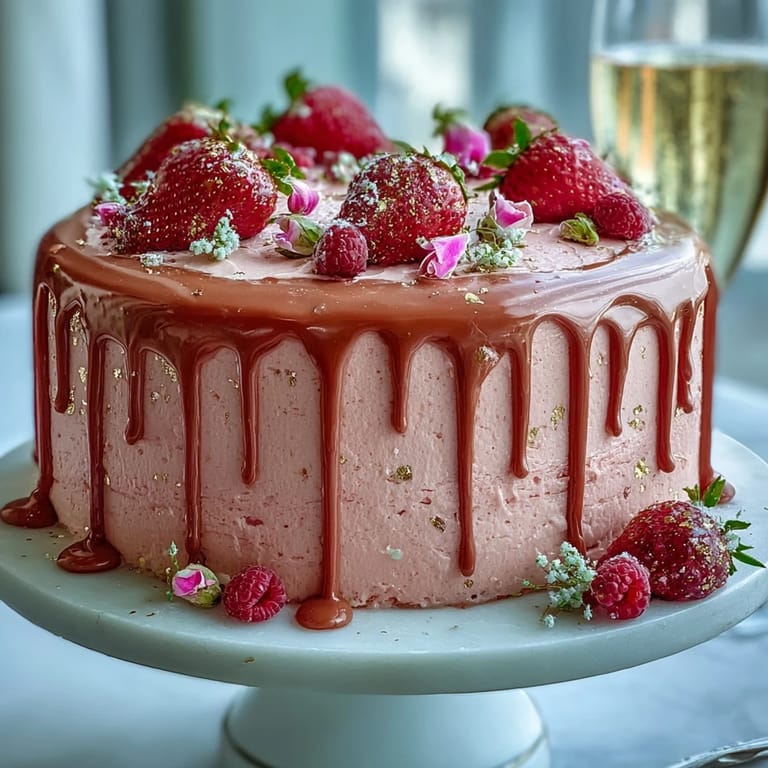
 It isn't every day the kitchen fills with the scent of rosé mingling with vanilla and cocoa—there's a sort of hush that settles in when baking a cake meant for celebrating someone you love. The first time I attempted a rosé velvet cake was out of curiosity after seeing a blushing slice at a friend's garden party. I remember jostling my mixing bowls around, a little skeptical, but the sight of the batter turning soft pink had me quietly grinning. There's a certain thrill before you unmold a layer cake, hands dusted with flour, hoping for even crumb and color. And when it finally emerges, adorned with shimmering gold and that hint of champagne blush, it never fails to fill the room with delight.
When I made this cake for my cousin's bridal shower, I remember the laughter bouncing around the kitchen as we debated who'd get to lick the whisk. She was humming along to her favorite playlist, sunlight spilling in, and everyone seemed to pause just to watch as I painted the final gold drip. It felt more like an art project than baking, and the anticipation was almost as sweet as the cake itself.
Ingredients
- All-purpose flour: This forms the base of a sturdy yet tender crumb—always sift for the plushest layers.
- Granulated sugar: Sweetens the cake and helps each slice stay soft; mix it into dry ingredients to distribute evenly.
- Baking soda: Adds lift for lightness; double-check it’s fresh for a good rise.
- Fine salt: Tiny amount, big difference—it sharpens the chocolate and rosé flavors.
- Cocoa powder (unsweetened): Just a hint for depth; sift to avoid lumps.
- Vegetable oil: Keeps the cake super moist and tender—don't skimp!
- Large eggs: Bind everything together; room temperature eggs mix in smoother.
- Buttermilk: Adds a gentle tang and makes the crumb plush; bring it up to room temperature for best mixing.
- Rosé wine: The secret to that subtle, grown-up flavor—choose something crisp and not too sweet.
- Vanilla extract: Adds warmth and rounds out the floral notes; real vanilla really shines here.
- White vinegar: Reacts with the baking soda for extra lift and a finer crumb.
- Pink or rose gel food coloring: The fun part! Start with a little and tint until you hit that perfect bridal blush.
- Unsalted butter: Room temperature is key for fluffing up that buttercream base.
- Powdered sugar: Sift first to keep the frosting smooth and lump-free.
- Heavy cream: Adds silkiness to the gold drip; even a touch makes a difference.
- Edible gold luster dust: Makes the finishing touch! Be sure it's labeled food safe.
- Vodka or clear lemon extract: Thins the gold paint and evaporates cleanly; just use a drop at a time.
Tired of Takeout? 🥡
Get 10 meals you can make faster than delivery arrives. Seriously.
One email. No spam. Unsubscribe anytime.
Instructions
- Prep Your Pans:
- Grease and line three 8-inch cake pans with parchment, and preheat your oven so it's ready to greet your batter. You'll thank yourself later when the cakes slide right out.
- Mix the Dry Ingredients:
- Sift together flour, sugar, baking soda, salt, and cocoa in a big bowl. The kitchen will already smell a little cozy and sweet at this point.
- Combine Wet Ingredients:
- Whisk oil, eggs, buttermilk, rosé, vanilla, and vinegar in a separate bowl until creamy and unified. The color will look pale but trust the process—it's about to get pretty.
- Bring It All Together:
- Pour wet into dry and gently fold until almost mixed; swirl in the pink gel food coloring until you get that perfect rosy shade. Avoid overmixing—just a few strokes until it's smooth!
- Bake the Layers:
- Divide among the pans and bake for 30-35 minutes, peeking only near the end. Your kitchen will fill with a floral, cocoa-perfumed warmth as the cakes rise and dome.
- Cool and Unmold:
- Let the cakes rest in their pans for 10 minutes before turning onto a rack to cool fully. Patience here keeps the layers plush and prevents sticking.
- Make the Buttercream:
- Beat butter until pale and airy, then blend in powdered sugar a cup at a time. Add rosé and vanilla, whipping everything to a fluffy cloud—taste and adjust until it's just right.
- Assemble the Cake:
- If your cakes are domed, trim them level. Stack with buttercream between each layer, crumb coat, chill briefly, then frost the outside for a dreamy finish.
- Gold Drip Prep:
- Melt white chocolate with cream until smooth, then let it cool just enough to thicken. Mix gold luster with vodka or extract to form a sparkly paint.
- Drip and Paint:
- Spoon the (slightly cooled) white chocolate over the cake's edges; the drips should be slow-moving and elegant. Once set, paint each drip gold for that luxurious shimmer.
- Decorate and Finish:
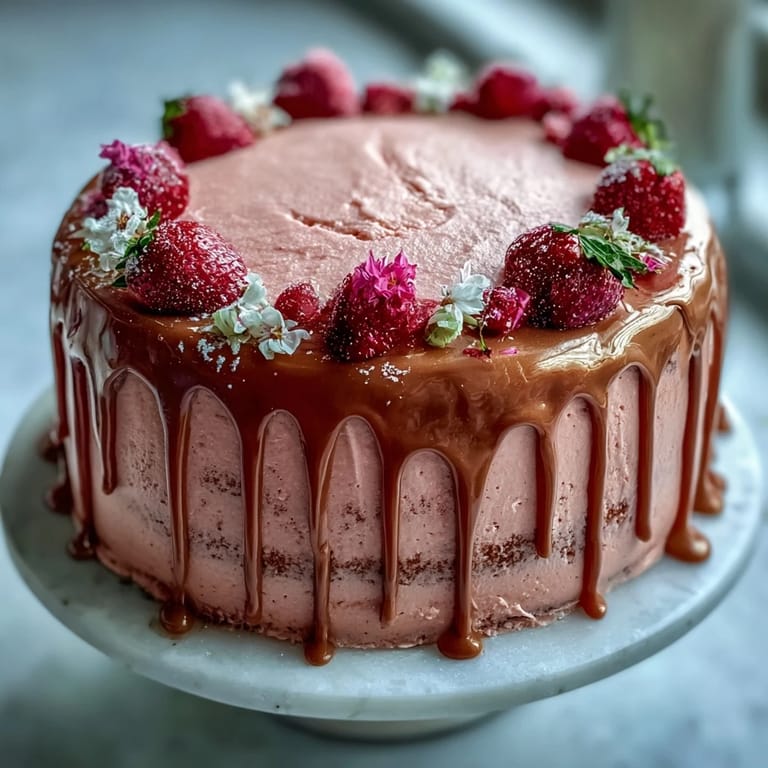
- Add extra touches like edible flowers or berries, if you're feeling fancy! Snap a photo (it's required) before everyone dives in.
 Save to Pinterest
  Save to Pinterest
 Watching everyone's faces light up as the first slice revealed its rosy layers—there was a round of applause right at the table. The cake may have been the centerpiece, but it was the laughter and clink of glasses that made that afternoon unforgettable.
What to Do With Leftover Rosé
Any leftover rosé doesn’t go to waste—pour a glass for yourself while decorating, or save it for a celebratory toast once the baking’s done. It also makes a lovely simple syrup if you want to brush your cake layers for extra moisture and flavor.
How to Store and Serve for Maximum Wow
If you prep the cake a day ahead, store it covered in the fridge, but let it come to room temperature before slicing so the crumb stays soft and the buttercream feels dreamy. A warm knife cuts clean slices and shows off those layers, especially with the gold shimmer catching the light.
Decorating Secrets for a Bridal-Worthy Finish
Don’t be afraid to play with extra gold accents—edible pearls, dried rose petals, or fresh berries scattered around the base make it extra celebratory. An offset spatula is your friend for smooth buttercream edges.
- A chilled cake makes drip decorating easier and less messy.
- If you’re nervous about the gold paint, practice on parchment first.
- Gold luster dust goes a long way—just a light touch will shine.
 Save to Pinterest
  Save to Pinterest
 This cake always manages to turn special days into sparkling memories. May your bridal shower be filled with rosy slices, golden laughter, and stories you’ll tell for years to come.
Recipe FAQs
- → Which rosé works best here?
Choose a dry or sparkling rosé with bright berry and floral notes; avoid overly sweet bottles so the wine complements the buttercream without making it cloying.
- → How can I keep layers even and stable?
Level each layer with a serrated knife or cake leveler, apply a thin crumb coat, then chill for 20–30 minutes before the final frosting to prevent sliding and ensure sharp edges.
- → Can I reduce alcohol flavor in the buttercream?
Use less rosé or replace some wine with additional buttermilk or a splash of clear fruit juice; taste as you go to maintain balance without thinning the buttercream too much.
- → How do I make the gold drip safe to eat?
Mix edible gold luster dust with a small amount of vodka or clear lemon extract to form a paint; brush only on edible white-chocolate drip and confirm the luster dust is labeled food-safe.
- → What's the best way to store and serve?
Cover and refrigerate the finished cake; bring it to room temperature for 30–60 minutes before serving to soften the buttercream and enhance flavors.
- → Any tips for preventing color bleed from food coloring?
Use gel or paste coloring sparingly and fold it in gently at the end of mixing. Allow batter to rest briefly before baking to let pigments distribute evenly and avoid streaks.