 Save to Pinterest
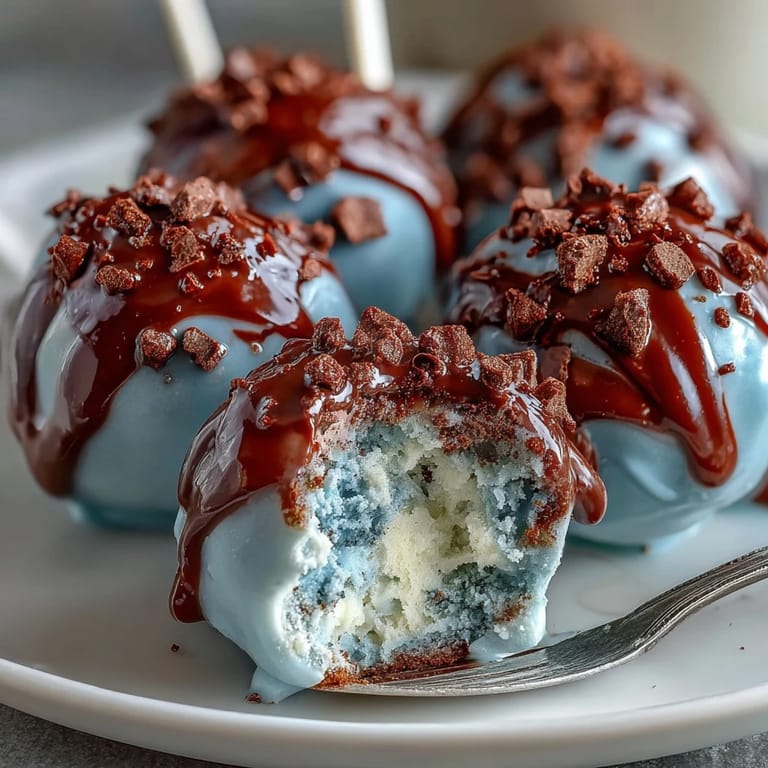
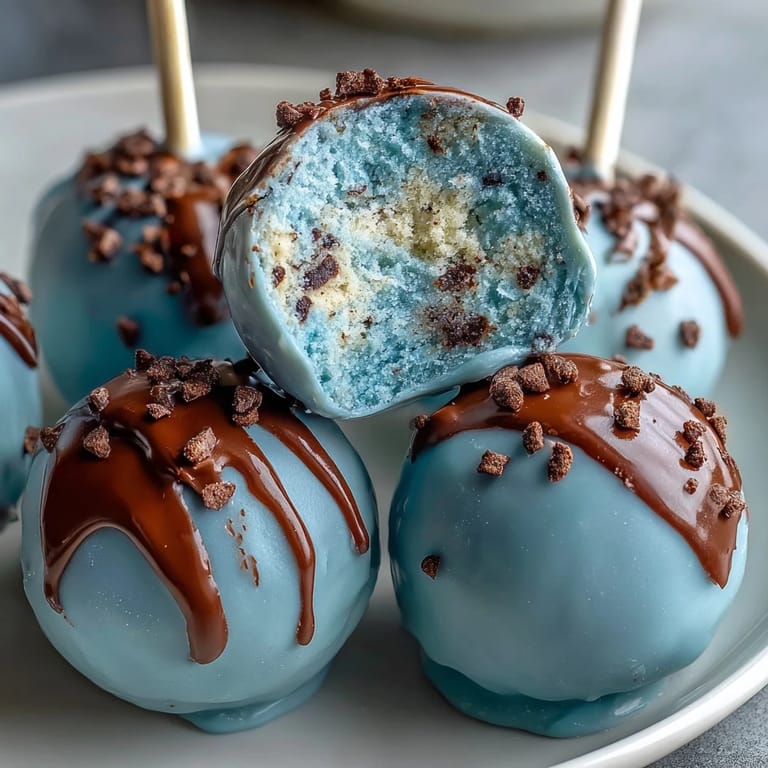
 My sister texted me a photo of robin eggs she found in her garden, and suddenly I was determined to recreate that exact shade of blue in dessert form. What started as a casual spring baking idea turned into an afternoon of me hunched over melted chocolate, squinting at my phone screen to match the color perfectly. These cake pops became my obsession—not just because they're impossibly cute, but because nailing that speckled effect felt like actual magic the first time it worked.
I made these for an Easter potluck last year, and watching people's faces light up when they realized they could actually bite into something so pretty was worth every minute of standing there with a paintbrush. One guest asked if I'd made them the night before, and I had to admit I'd been up until 2 a.m. perfecting the speckle technique—turns out passion shows, even in cake pops.
Ingredients
- Vanilla cake (1 box mix or homemade): The foundation matters more than you'd think; I learned this by once using a chocolate mix thinking it wouldn't show, but the frosting turned muddy and nothing looked right.
- Unsalted butter (1/2 cup softened): Room temperature is non-negotiable here—cold butter will refuse to cream smoothly and your frosting will be grainy.
- Powdered sugar (1 1/2 cups): Sift it first if it's lumpy; I skip this sometimes and regret it immediately when my mixer gums up.
- Milk (2 tbsp): This is your texture controller—add it slowly because you might need less than you think.
- Vanilla extract (1 tsp): Pure extract tastes noticeably better than imitation, and this small amount makes a real difference in the frosting.
- White candy melts or white chocolate (12 oz): Candy melts are more forgiving than real chocolate and won't seize as easily, which is why I prefer them for beginners.
- Blue gel food coloring: Oil-based is essential—water-based will break your chocolate and you'll end up with a grainy, textured mess that won't coat smoothly.
- Coconut oil or vegetable shortening (2 tbsp optional): This thins the coating just enough to create that perfect dipping consistency without diluting the color.
- Cocoa powder (1 tbsp): Creates the speckled effect that makes these look authentically robin egg-like; regular cocoa works fine here.
- Vodka or clear extract (1-2 tsp): This dissolves the cocoa into a speckle-able paste; I use vodka because it evaporates cleanly and leaves no flavor behind.
- Lollipop sticks (24): Buy food-grade sticks; the craft store ones sometimes have finishes that aren't meant for eating.
Tired of Takeout? 🥡
Get 10 meals you can make faster than delivery arrives. Seriously.
One email. No spam. Unsubscribe anytime.
Instructions
- Bake and cool your cake:
- Follow the box or recipe instructions, then let it cool completely on a wire rack—warm cake will mess with your frosting consistency later. This is the perfect time to take a break and actually taste what you're making.
- Cream the frosting base:
- Beat softened butter until it's pale and fluffy, about 2 minutes, then gradually add powdered sugar while mixing on low speed so you don't send a cloud of sugar across your kitchen. Add milk and vanilla at the end, beating until smooth.
- Make the cake-frosting mixture:
- Crumble the cooled cake into fine crumbs with your hands, then add frosting bit by bit until it holds together when squeezed but doesn't feel oily. You'll probably use less than the full amount, and that's exactly right.
- Roll the cake balls:
- Use a tablespoon or small cookie scoop to keep them uniform, then place them on parchment paper and pop them in the freezer for 15 minutes until they're firm enough to stick. This step is crucial because soft cake balls will slip off your sticks and dissolve into the chocolate.
- Prepare the blue coating:
- Melt your candy melts gently in 20-second microwave bursts, stirring between each one, then add blue gel food coloring drop by drop until you reach that perfect robin egg shade. Add a tiny bit of coconut oil if it's too thick, but go slowly because a little stretches a long way.
- Stick and secure:
- Dip each stick tip in the blue coating, press it halfway into a cake ball, then refrigerate for 10 minutes so the stick really sets. This prevents the stick from spinning loose when you dip the whole pop.
- Full coating dip:
- Twirl each pop in the blue chocolate, letting excess drip back into the bowl, then place it upright in your Styrofoam stand to set. Work in batches if your chocolate starts to cool and thicken.
- Add the speckles:
- Mix cocoa powder with vodka until it's the consistency of thin paint, dip a small clean paintbrush in it, and flick it gently across each pop while the coating is still slightly tacky. Too much pressure creates blobs instead of speckles, so practice on one first.
- Final set:
- Leave them in the Styrofoam stand at room temperature for at least an hour until the coating is completely hardened and the speckles are dry.
 Save to Pinterest
 These little pops somehow became the thing people ask me to make every spring now, which feels wild for something that started as me just trying to match a robin egg color. There's something genuinely special about making food that's this pretty—it tastes better because it looks better, or maybe people just feel happier eating something whimsical.
Color Matching Without Stress
The robin egg blue doesn't need to be perfect—in fact, slightly varied shades look more natural and charming than if they're all identical. I used to agonize over getting the exact same color in every batch, but then I realized the speckles made everything look intentionally varied and artistic. Start with less coloring than you think you need and add drops until the shade makes you happy; you can always go slightly deeper but you can't un-color melted chocolate.
Flavor Twists Worth Trying
The vanilla frosting is a clean canvas, which means you can absolutely experiment without ruining anything. I've tried lemon extract for brightness, almond extract for something floral, and even a tiny bit of rum extract for depth—each one transforms the whole experience without changing the gorgeous blue exterior.
Storage and Make-Ahead Strategy
These actually improve slightly if you let them sit at room temperature for a day after assembly, as the coating becomes less waxy and the flavors blend together. You can make the cake balls up to 3 days ahead and freeze them, then do the chocolate dipping and decorating the day before serving, which breaks up the work nicely.
- Room temperature storage keeps the chocolate glossy and snappy, while refrigeration softens the texture slightly but extends freshness to about a week.
- Stack them in an airtight container with parchment between layers so the sticks don't poke holes in your coating.
- These travel beautifully in a sturdy box, making them perfect for potlucks, gifting, or just hoarding for yourself.
 Save to Pinterest
 Making these feels like a small act of spring celebration, whether you're baking for Easter or just need an excuse to create something beautiful. They're proof that a little extra care and a paintbrush can turn ordinary cake into something genuinely memorable.
Recipe FAQs
- → What coloring is best for a smooth coating?
Use oil-based gel food coloring when tinting white chocolate or candy melts to prevent seizing and achieve a smooth, vibrant finish.
- → How do I prevent the cake pops from falling apart?
Mix cake crumbs with frosting gradually until the mixture holds together but is not too sticky, then chill before shaping.
- → Can I use extracts to enhance the flavor?
Yes, adding lemon or almond extract to the frosting offers a refreshing twist to the vanilla base.
- → What is the purpose of chilling cake balls before coating?
Freezing the cake balls firms them up for easier dipping and helps the coating set neatly without cracking.
- → How do I achieve the speckled decoration effect?
Create a thin cocoa and vodka or extract paste, then flick gently over coated pops with a food-safe brush for a speckled look.