 Save to Pinterest
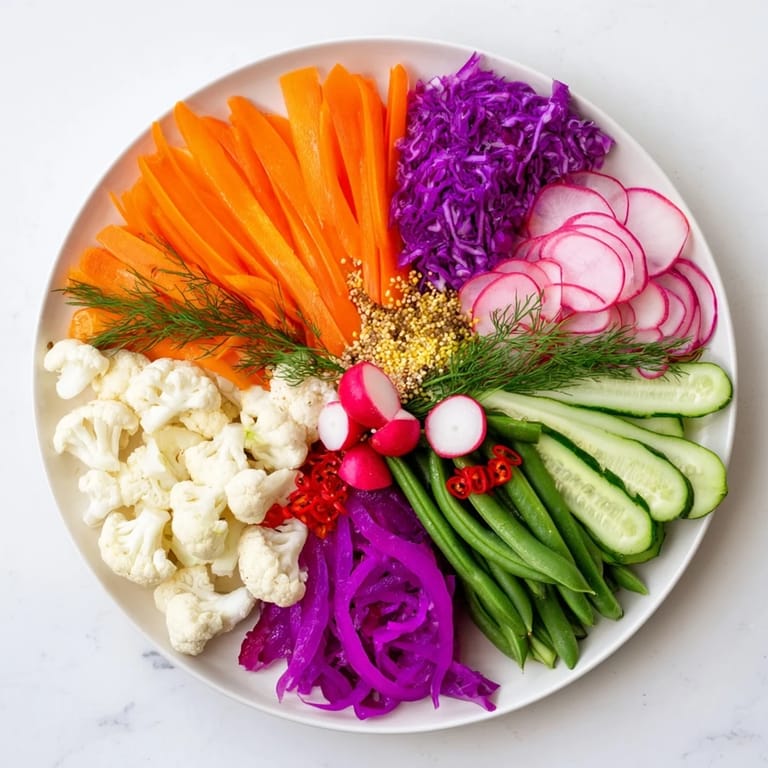
 I still remember the first time I came home with a jar of homemade pickled vegetables from a farmer's market in Portland. The colors were so vibrant—jewel-toned reds, sunny yellows, deep purples—all gleaming under the pickling brine. I was mesmerized. That night, I opened the lid and the smell hit me: tangy, aromatic, alive. I realized I'd been missing out on something deeply satisfying. Now, whenever I make this pickled and fermented feast, I'm transported back to that moment of discovery, except now the jars are sitting on my own kitchen counter, filled with vegetables I've prepared myself.
There was this moment, maybe two years ago, when I brought a board of these pickled vegetables to a potluck. I'd arranged them in careful little lines—greens next to reds next to purples—and honestly, I was nervous nobody would touch them. But within minutes, people were circling back for more, asking what my secret was. The secret, I realized, wasn't any special ingredient. It was that these vegetables tasted alive in a way supermarket produce rarely does. That's when I knew this recipe was something worth perfecting and sharing.
Ingredients
- Carrots, julienned (1 cup): They soften just enough to become tender without losing their natural sweetness. The thin cuts mean they absorb the brine quickly, usually within 12 hours.
- Cucumber, sliced (1 cup): Choose firm, fresh cucumbers—they hold their crunch beautifully and provide a refreshing crispness that cuts through the vinegar's tang.
- Radishes, thinly sliced (1 cup): These little flavor bombs keep their peppery bite even after pickling, adding a surprising kick that makes people ask what the spicy vegetable is.
- Red cabbage, shredded (1 cup): Not only is it a gorgeous magenta color, but cabbage's natural sugars become more pronounced as it pickles, creating a subtle sweetness.
- Cauliflower florets (1 cup): These absorb the brine beautifully and become tender-crisp. They're your hearty, satisfying vegetable in the mix.
- Green beans, trimmed (1 cup): They stay firm and provide a textural contrast. Pick younger beans if you can—they won't be tough.
- White vinegar (2 cups): The backbone of your brine. It's clean, reliable, and lets the vegetable flavors shine through without overpowering them.
- Water (2 cups): Dilutes the vinegar so it's tangy but not harsh, creating that balanced, lip-puckering sensation that makes you reach for another bite.
- Sugar (2 tbsp): Just enough to balance the acidity—it's not about sweetness, but about rounding out the flavor profile so nothing tastes one-dimensional.
- Kosher salt (2 tbsp): The magic ingredient that draws out the vegetables' natural juices and helps them stay crisp. Don't skimp on this.
- Garlic cloves, sliced (2): They soften as they sit in the brine and become almost sweet, infusing everything with their gentle aroma.
- Mustard seeds (1 tbsp): These tiny pearls burst with flavor and add a subtle spice that plays beautifully with the vinegar.
- Coriander seeds (1 tbsp): They bring an almost citrusy warmth that makes people wonder what makes your pickles taste so interesting.
- Black peppercorns (1 tsp): Whole peppercorns stay firm and add little bursts of peppery heat—much better than ground pepper, which would cloud your brine.
- Bay leaves (2): These add a subtle earthiness and help preserve the vegetables naturally, the way old-fashioned preserving has always worked.
- Fresh dill (3 sprigs): Dill is practically made for pickles. It adds a bright, herbal note that feels almost fresh even after weeks in the jar.
- Red chili, sliced (1 small): Optional, but this is where you adjust the heat to your preference. It brings a gentle warmth that sneaks up on you.
- Kimchi (1 cup, optional): Store-bought is fine—adds a fermented complexity and a different kind of funk that works beautifully alongside quick pickles.
- Sauerkraut (1 cup, optional): Another fermented friend that brings probiotic benefits and a deeper, funkier flavor to your board.
Tired of Takeout? 🥡
Get 10 meals you can make faster than delivery arrives. Seriously.
One email. No spam. Unsubscribe anytime.
Instructions
- Get Your Mise en Place Ready:
- Wash all your vegetables thoroughly and pat them dry. There's something meditative about this step—handling each vegetable, feeling their firmness, making sure they're clean and ready. Julienne those carrots into thin matchsticks, slice your cucumbers, shred that cabbage, and trim the green beans. Organize everything as you go. This prep work is where the recipe actually gets made, honestly.
- Build Your Brine:
- Pour vinegar and water into a saucepan and bring it to a gentle boil. You'll see steam rising, and it should smell sharp and clean. Add your sugar and salt, stirring until they completely dissolve—this usually takes about 2-3 minutes. You'll know it's ready when the mixture looks clear and tastes balanced: tangy, slightly sweet, salty. Let it cool for just a few minutes—you want it warm enough to soften the vegetables but not so hot that you'll burn yourself handling the jars.
- Pack Your Jars Intentionally:
- This is the fun part. Get out your clean glass jars—mason jars work beautifully, but any glass jar with a lid will do. Now here's the secret: pack them with an eye toward beauty. Group your colors together. Put all the reds in one line, all the greens in another, the oranges and purples creating a gradient. Press them in gently but firmly so they're packed but not crushed. Aim for vegetables to be tightly placed so they'll soak evenly.
- Season Each Layer:
- As you pack, distribute your garlic slices, mustard seeds, coriander seeds, peppercorns, bay leaves, dill sprigs, and chili slices throughout the jars. Don't put all the spices in one jar. Spread the aromatics so every bite has flavor.
- Pour in the Brine:
- Carefully pour that beautiful warm brine over your vegetables until they're completely submerged. This is important—any vegetable sticking above the brine will oxidize and turn brown. If you need more brine, make a quick batch: equal parts vinegar and water, a pinch of salt, a pinch of sugar. Pour it in slowly, listening to the gentle sound of the liquid settling around the vegetables.
- Cool and Seal:
- Put the lids on your jars and let them cool to room temperature. As they cool, you might hear a little pop—that's the seal setting if you're using canning jars. Once cool, move them to the refrigerator.
- Wait with Patience:
- This is the hardest part. For quick pickles, wait at least 12 hours. I know it's tempting to sneak a taste after a few hours, but truly, the flavor develops beautifully between 12-48 hours. The vegetables soften slightly, the spices fully bloom, and everything becomes a unified flavor rather than separate ingredients.
- Or Ferment for Deeper Magic:
- If you're feeling adventurous, try fermentation. Make a 2% salt brine—that's 20 grams of salt per 1 liter of water. No vinegar, no heat. Pack your vegetables the same way, pour the brine over them, and leave them on the counter at room temperature. Check them daily, tasting as you go. After 5-7 days, you'll notice bubbles forming, the vegetables changing color slightly, and the flavor developing into something deeper, funkier, more complex. That's the magic of fermentation—you're creating living food.
- Arrange for the Reveal:
- When you're ready to serve, take your pickled vegetables and arrange them on a beautiful board or platter. If you've packed them well, they'll come out looking like edible art. The colors should pop, the arrangement should draw people in. Stand back and admire your work—this is a feast for the eyes before it's a feast for the mouth.
 Save to Pinterest
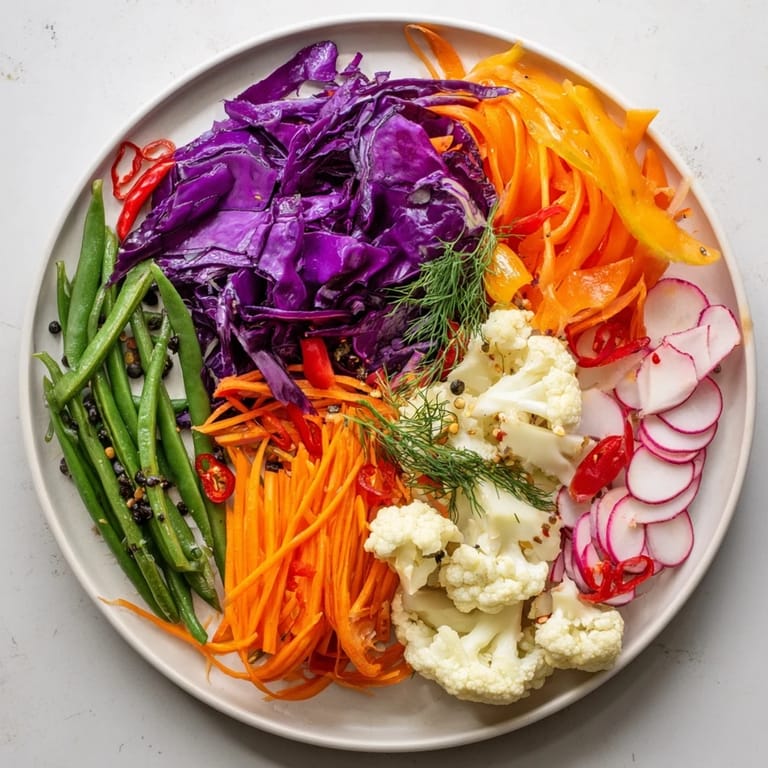
 There's something that happens when you serve this feast at a dinner table. People slow down. They taste each vegetable individually, noticing the different flavor notes, comparing the quick pickles to the fermented ones. Conversations start about textures and tang, about how surprising radishes taste when they've been pickled, about why fermented vegetables make them feel good. That's when I realized this recipe isn't just about preserving vegetables—it's about creating moments where people pay attention to what they're eating. It becomes an experience, not just a side dish.
Quick Pickles vs. Fermentation: Understanding the Difference
Quick pickling is all about speed and reliability. You heat the brine, pour it over vegetables, and within 12 hours you have something delicious. The heat kills any bacteria, and the vinegar preserves everything. It's straightforward, consistent, and honestly perfect for weeknight entertaining. But fermentation is a different beast entirely. You're not killing bacteria—you're inviting the right ones to a party. The salt brine creates an environment where lactobacillus thrives, and these beneficial bacteria create lactic acid as they eat the vegetables' natural sugars. The result is more complex, more alive, better for your gut. Some people swear by fermented vegetables for their probiotic benefits. Me? I love both, and they taste dramatically different. The quick pickles are bright and vinegary. The fermented ones are funky and deep. I usually make both and let people choose which flavor profile speaks to them.
Vegetables as a Canvas: Choosing What to Pickle
The vegetables I've listed here are my tried-and-true lineup, but honestly, the beauty of pickling is that you can pickle almost anything. Want to add sliced beets for deep jewel tones and earthy sweetness? Go for it. Pearl onions bring a subtle sweetness and create little flavor bombs. Thin-sliced turnips become almost crispy. Green tomatoes are unexpectedly delicious. Daikon radish is milder than regular radishes but takes the brine beautifully. Even thick asparagus spears work. The key is cutting everything relatively uniform in size so they pickle evenly. I've learned to think seasonally—whatever looks best at the farmer's market in any given month becomes the star of that week's pickle batch. Spring brings tender young carrots and fresh garlic scapes. Summer is all about cucumbers and green beans. Fall is when I go wild with root vegetables. Winter brings me back to sturdy cabbage and radishes. This recipe becomes a celebration of what's growing, not what's convenient.
Vinegars, Herbs, and Custom Flavor Profiles
Once you understand the basic formula—vegetables, salt brine, acid—you realize there's infinite room for creativity. I started with white vinegar because it's neutral and lets the vegetables shine, but I've since explored the whole vinegar world. Rice vinegar brings a gentler, slightly sweet note. Apple cider vinegar adds a subtle fruitiness. White wine vinegar feels more elegant somehow. Red wine vinegar turns everything slightly pink. There's also the herb game. That dill in my recipe? You could swap it for tarragon, which brings an anise-like mystery. Fresh cilantro makes everything taste like you're eating a fresh salsa. Thai basil brings unexpected aromatics. I've even tried adding fresh ginger and star anise for an Asian-inspired version. Citrus zest—lemon, lime, orange—adds brightness. The lesson I've learned is that the basic structure stays the same, but the personality changes completely based on your flavor choices. Make it Mediterranean one week with oregano and lemon. Make it Indian-inspired the next week with cumin seeds and turmeric. This recipe is actually dozens of recipes hiding inside one template.
- Start with the classic recipe, then experiment with one ingredient change at a time so you can taste what each addition does
- Always taste the brine before you pour it over vegetables—if it tastes good, the pickles will be good
- Keep a pickling journal for a month or two, noting which vegetables, vinegars, and herbs worked best so you build your own signature style
 Save to Pinterest
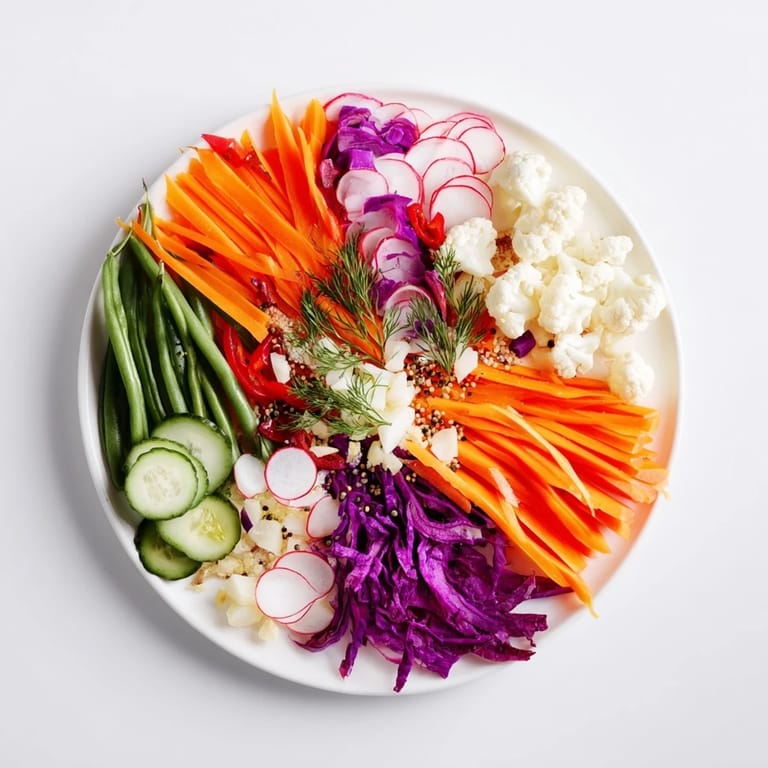
 Every time I make this pickled and fermented feast, I'm struck by how something so simple—vegetables, salt, vinegar, time—becomes something so extraordinary. There's something deeply satisfying about taking fresh produce and transforming it into something that lasts, tastes better with time, and brings people together.
Recipe FAQs
- → What vegetables work best for pickling and fermenting?
Carrots, cucumbers, radishes, red cabbage, cauliflower, and green beans are excellent for pickling and fermenting due to their crisp texture and flavor absorption.
- → How long should the vegetables be pickled or fermented?
Quick pickling requires at least 12 hours in the fridge, whereas fermentation typically takes 5 to 7 days at room temperature for deeper flavors.
- → What spices enhance the flavor of pickled vegetables?
Garlic, mustard seeds, coriander seeds, black peppercorns, bay leaves, fresh dill, and chili add complex aromas and a balanced tang to the vegetables.
- → Can this method be adapted for seasonal vegetables?
Yes, seasonal vegetables like beets, turnips, or pearl onions can be used to vary flavor and color profiles throughout the year.
- → What are ideal serving suggestions for this platter?
Arrange the pickled and fermented vegetables in jars or bowls on a board in linear or grid patterns; pair with crusty bread, cured meats, or vegan cheeses.
- → Are there alternative vinegars to use in the brine?
Rice vinegar or apple cider vinegar can be substituted to introduce unique flavor variations while maintaining acidity.